
Turn an unloved broken chair to cute plant display :)
- Hayley
- Sep 14, 2018
- 4 min read


This old woven chair has been sitting in my garage for several months after we realised it was broken and unusable as a chair anymore (see the red arrows!). Being a lover of used and old things there was no way I was just going to throw it away, so it's sat there while I figured what to do with it! I'm quite a fan of turning random things into planters (suitcase, bikes, chairs!), so that's what I thought I would attempt here :)
First of all I had to remove the weaving for the seat so I could make space for a plant pot and see what had actually broken.
I just used some scissors to hack away at the weaving bit by bit; it was pretty tough stuff and was weaved fairly tightly so it took a good amount of snipping to get this off. Also, it was pretty gross as there was many years worth of dirt tucked away inside this weaving so I was glad to get rid of it! A good clean with a grease remover and I was ready to start repairs!

Two parts of the seat frame were snapped and I though about not repairing them and just removing the pieces but for the look of the chair I thought it would be better to repair them. Now if someone was going to actually sit on this chair again I would have had to make new pieces as the glued old ones wouldn't be stable enough, but I was just going for looks rather than function!

I glued the pieces together with some basic wood glue and clamped them to hold them in place, and used a couple of books too!
Once this was dry I touched up the joins with some wood filler; I used this in a few other places as well that had some significant dents and digs that were a little more 'rustic' than I wanted! This stuff is a paste but it's quite crumbly to put on so you'd need to let it dry and build it up for larger repairs.


Once the wood filler was dry, I left it over night, mostly because I didn't have time on the same day but you don't want to start sanding this if it's still soft underneath. So, I sanded off the rough edges with some fine sandpaper, and then after another wipe down to clear of the dust I was ready to start painting!
I used a chalk paint from Amelie Prager in Bianco Roto and it took three coats to cover this chair fully. I have some other colours of this paint to try so we'll see whether it's just the white and lighter colours that don't have as good coverage.
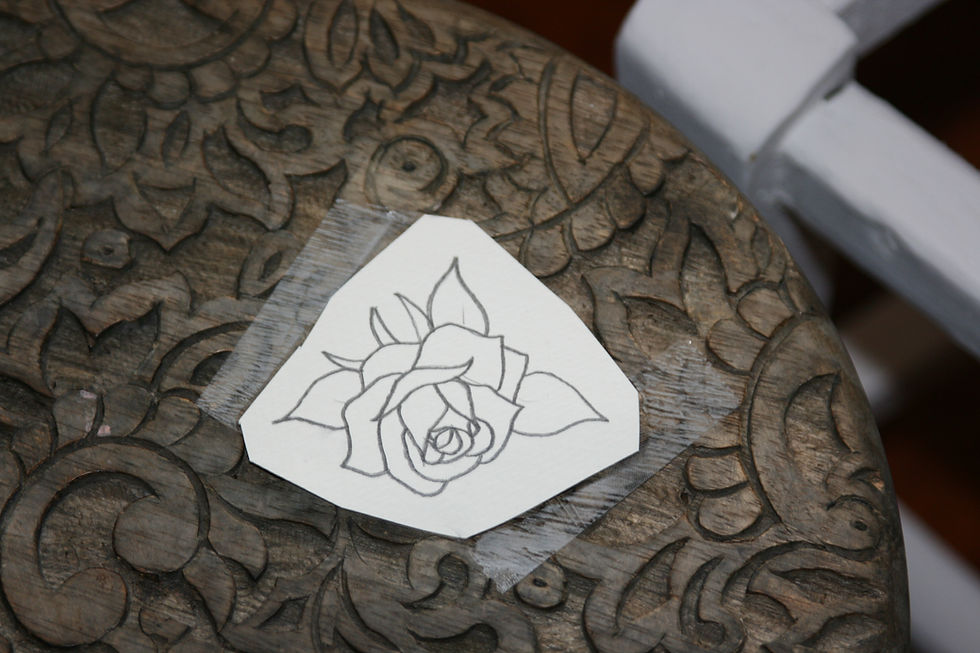
For this chair I wanted to try some watercolour painting to add some cuteness :) I started with sketching out an outline of a rose and some leaves then went over it with a dark lead pencil which was a 5B - you could just print out an image and do the same thing. I then stuck this to where I wanted it to go on the chair, pencil facing the wood, and rubbed over the back with handle of my scissors (because that's what I had handy!). This left a faint outline of my drawing on the chair ready for me to begin painting it. I used Windsor and Newton watercolours and just one fine brush - started with the lightest pink colour all over the rose, then did the outlines in a much darker, thicker pink, then kept blending and adding different pinks to get the detail I wanted. It becomes harder to see your pencil outlines and you do have to just tell yourself to stop at some point! I am NOT a well practiced watercolour painter but you can find tons of great tutorials for beginners just by having a google to help you. My attitude tends to be if it looks rubbish I can always give it a sand and paint over in white again!

So once the little rose painting was dry, I sanded the chair to smooth out the finish and distress it. I did lightly sand over the rose painting with a coarser sandpaper just to give it a slight distress and vintage look.


I gave the whole chair a covering of clear wax using a wax brush to seal it. I thought about using a clear sealant instead as this chair is going outside, but it's undercover so I decided a wax would be ok.
I choose a mix of ivy for the plant pot to go 'inside' this chair and the whole pot is sitting on an upturned terracotta pot so that it sits nice and proud coming out of the chair seat. I love it! I really love the ivy mix and how nicely it goes with the vintage chair look. I'm also really proud of myself for trying some freehand flower painting on this chair, as I said I am not an artist but I love the look of this that you just can't get with a stencil. I'm going to try the same look using decoupage and transfer gel soon, so I'll share how that goes!


Privacy Statement: We do not share personal information with third-parties nor do we store information we collect about your visit to this blog for use other than to analyze content performance through the use of cookies, which you can turn off at anytime by modifying your Internet browser's settings. We are not responsible for the republishing of the content found on this blog on other Web sites or media without our permission. This privacy policy is subject to change without notice.

Comments